
While making a turn at an intersection, the airbag light came ON in the dash and then the MFD (multifunction display) showed Airbag Fault. Also, the buttons on the steering wheel stopped working and wouldn’t even light up when the headlight switch was turned to the ON position. I scanned the car with VAG-COM by Ross-Tech and the following fault codes showed on the report.
01587 - Igniter 2 for Airbag; Drivers Side (N250)
001 - Upper Limit Exceeded - Intermittent - MIL ON
00588 - Airbag Igniter; Driver Side (N95)
001 - Upper Limit Exceeded - Intermittent - MIL ON
Due to the fact that the steering wheel multifunction buttons stopped working and lighting at the same time as the airbag fault light came ON, it narrowed it down to the steering wheel Clockspring. Below are step by step illustrations showing how to replace the steering wheel clockspring on a 2006 VW Passat 2.0T.
STEP 1
First of all, you need to start by placing the key in the ignition and pressing it in until the dash icons light up only without starting the engine. Making sure that the steering wheel is in the center position, turn the steering wheel 90 degrees to the left. Now leave the key/steering wheel in this position, and disconnect the battery cables. After disconnecting the battery, don’t start working on the car for about 20 minutes to make sure all circuits are off. Otherwise, there is a chance that the airbag may deploy when it is being disconnected. Now the reason why we left the key in the ignition is to avoid the steering wheel from locking up when we turn it with the battery disconnected.

STEP 2
Now, start by prying open the top cover of the steering wheel with a flat head screwdriver and cloth to avoid scratching the plastic. It pops right off because it is held on by clips. After you remove this cover you will be able to see the steering wheel clockspring right behind the steering wheel and it will make the steering wheel clips easier to access.

This is the steering wheel Clockspring from a vertical view. It is the first part right behind the steering wheel with a white rectangular sticker on it.

STEP 3
Place a small mirror on the dash so you can get a rear view of the steering wheel. You will see the metal steering wheel clips that hold the steering wheel airbag.


STEP 4
Place a small screw driver on top of the metal clip and press it down to release it from the black latch. After doing so, the steering wheel airbag will come loose and pop out from one side. After releasing the first airbag clip, turn the steering wheel 180 degrees so the second airbag clip is in the vertical position and release it as well. Now the steering wheel airbag should be full detached and only connected by the yellow wire harness.


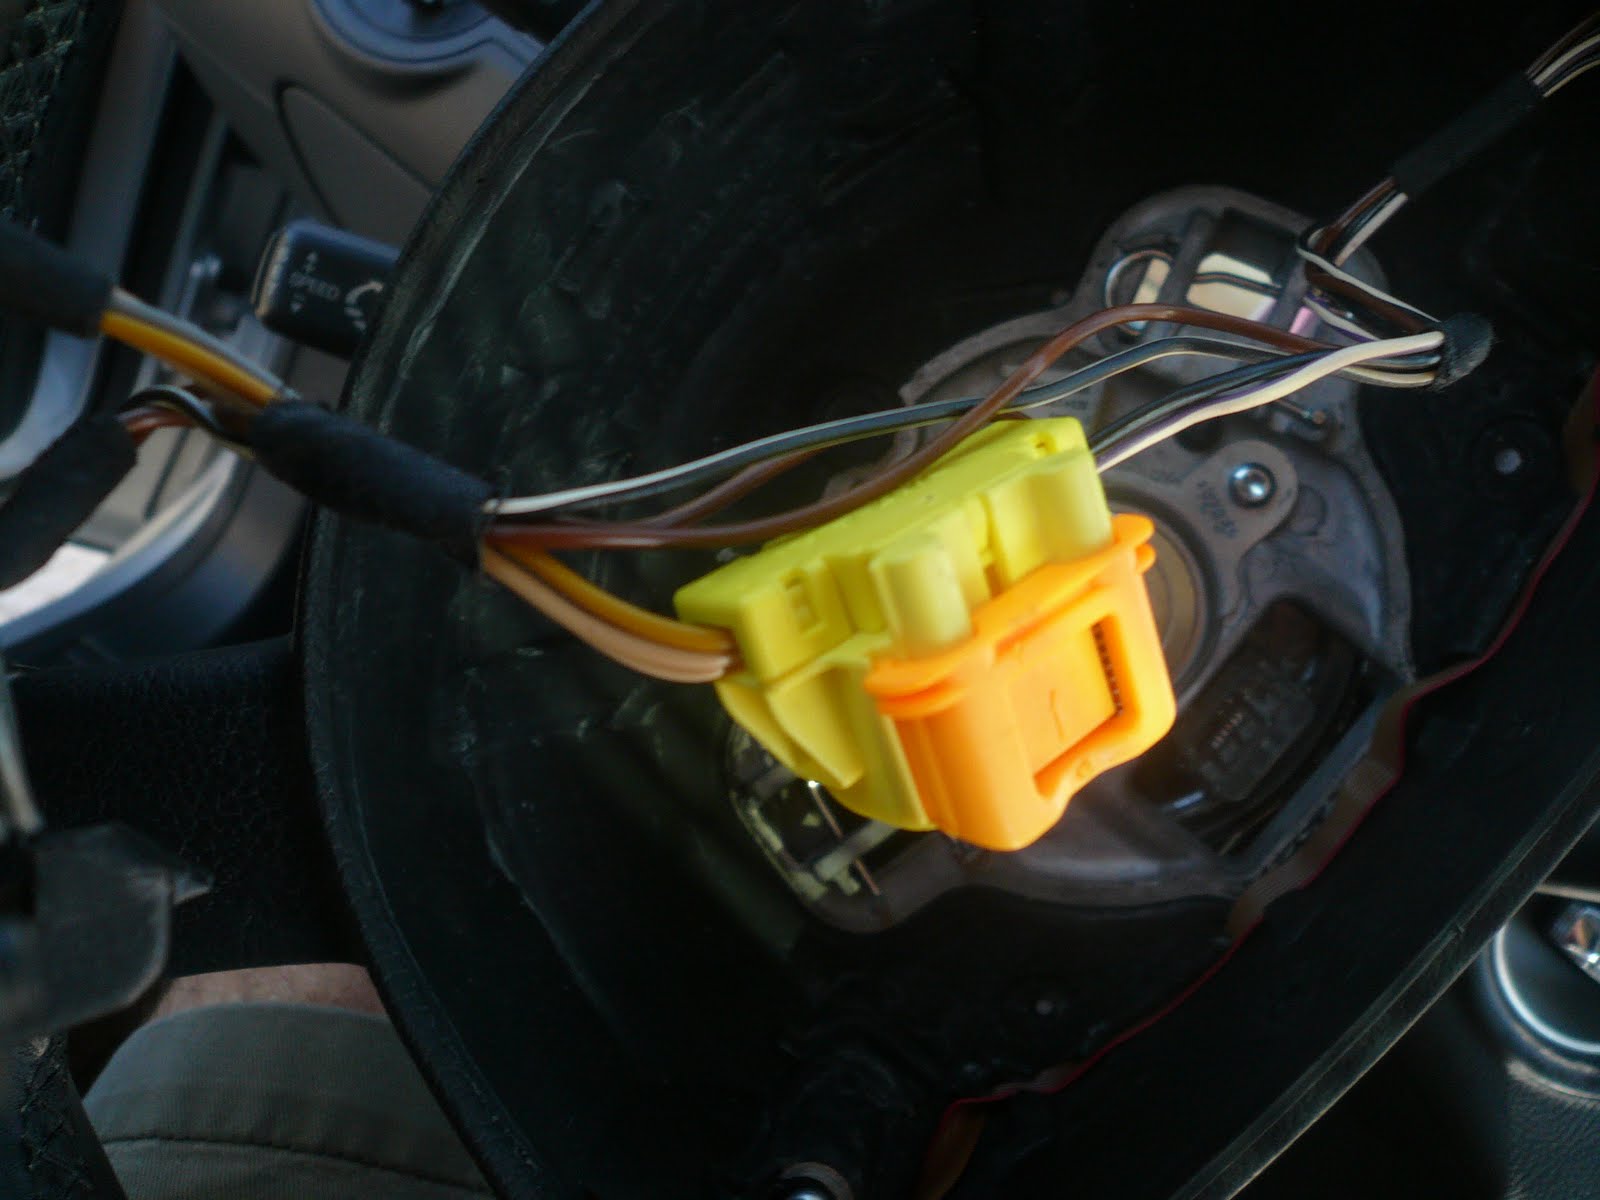
STEP 5
Now the yellow airbag connecter harness has an organge part on the right side. Inorder to disconnect it, you need to slide the orange part toward you in an upward dirction and it will detach.

STEP 6
Now turn the steering wheel back to the center position. Pay special attention if there are two markings 1)on the top edge of the center shaft and 2)on the opposite side of the first marking on the steering wheel part is your second marking. When you remove the steering wheel and want to put it back, these two markings have to be aligned inorder for the steering wheel to be centered. It should have these markings already, but if it doesn't, then mark them before removing the steering wheel.

STEP 7
Remove the center bolt that attaches the steering wheel.

STEP 8
This is a close up of the markings mentioned in the earlier step. Make sure they are there before removing the steering wheel.

STEP 9
Unscrew the two screws on the sides of the Clockspring to remove the lower steering column cover.

Beneath the Clockspring is the electronic module (with the yellow sticker on it), which the Clockspring plugs into.

STEP 10
On the right side of the electronic module are two black plastic clips. You need to unlatch them with a small flathead screwdriver to release the electronic module below, causing it to drop and detach from where the Clockspring is plugged into it on the front right side (where the yellow sticker is in the 2nd picture).


STEP 11
Now, remove the steering wheel Clockspring by simply pulling it out.

this DIY was almost identical for my 2006 A3
ReplyDeleteThe casters and wheels are available in different shapes and sizes and designs.
ReplyDeleteCasters and Wheels & Industrial Tire